#smooth scrolling jquery
Explore tagged Tumblr posts
Visit Tumblr Blog
Explore Tumblr blogs with no restrictions, modern design and the best experience.
Last Seen Tumblr Blogs


Fun Fact
The Tumblr app for Google Glass was released on May 16, 2013.
Text
Optimizing Performance in AngularJS Applications

The AngularJS framework is a very powerful JavaScript framework that allows one to create dynamic single-page applications (SPAs) easily. When applications become huge, they start to show performance issues, such as slow loading times and unresponsiveness for the user. Therefore, it is very crucial to have performance optimization in AngularJS applications in order to provide really smooth functioning as well as responsiveness.
This post will discuss the best ways to improve the performance of AngularJS applications and their efficiency. You can consider Angular JS Training in Chennai to sharpen your skills if mastering AngularJS and developing high-performing applications is your goal.
Using Fewer Watchers and Bindings Due to the true two-way data-binding modalities of AngularJS, the application will constantly keep a tab on whatever changes occur. The irony is that too many watchers and bindings slow down the performance. Each and every change triggers a digest cycle which is responsible for updating the UI.
Optimization: Limit defining $scope.$watch() to as few as possible in order to avoid unnecessary bindings. Make use of a one-time binding (::) to prevent static content changes from being continuously tracked. Keeping the use of expressions inside Angular directives such as ng-repeat to a minimum. By reducing the number of watchers, which could speed up the digest cycle in AngularJS, one gets faster performance from the application.
Optimize ng-repeat for Large Lists The ng-repeat is an often-used angular directive for rendering lists. Unfortunately, performance bottlenecks may occur with larger datasets.
Optimization: Use track by to efficiently rerender repeated elements. Ensure we have a pagination or lazy initialization such that we only load in those items we require. Alternatively, some may opt for third-party libraries such as AngularJS infinite scroll for improved list handling. The moment the ng-repeat is being managed efficiently, then the application would remain fast and responsive even to large datasets.
Scant DOM Manipulation Directly Direct manipulation of DOM is costly in terms of performance and would eventually slow down the application. Since AngularJS has provided directives to take care of the updates in DOM, it is more advantageous to avoid the direct manipulations frequently.
Best Practices: Make use of Angular directives like ng-show and ng-hide rather than modifying DOM elements manually. Limit the extent to which jQuery is used inside AngularJS applications. Cache DOM elements and reuse them instead of creating them again and again. Minimizing direct DOM manipulation enhances performance by reducing unnecessary reflow and repaint.
Optimization of HTTP Requests and API Calling The increased API calls can potentially slow down an application and put a lot of load on the server as well. So, optimization of data-fetching is one aspect without which the performance cannot be improved.
Optimization Techniques: Caching mechanisms can be used in an application in order to create the previously fetched data so that it can get stored and avoid going for another redundant API request. Debouncing the API from being called from the search fields to prevent the program from too many network requests. Fetch only what you need instead of fetching a complete database. Effective API handling means faster retrieval of data to give a smoother user experience.
Activate Lazy Loading for Modules Lazy loading is essentially a technique for improving initial load times since it loads only the required modules when you need them in AngularJS applications.
How Lazy Loading Helps: Decrease the size of the initial bundle, thus reducing the time it takes for pages to load. Supports dynamic loading, which improves the overall performance of application components. Grows scalability of application development. By lazy loading, AngularJS applications can better manage their resources and be more responsive.
Optimize filters and expressions Filters and expressions serve the purpose of formatting the data, but using these excessively slows down an application by making them run multiple times during the digest cycle.
Methods of Optimization: Use filters in controllers rather than in the direct template to minimize repeat evaluations. Avoid adding or using complex calculations using expressions. Cache values after they are computed so that they need not be recalculated again. It ensures application speed is maintained by efficient data processing happening.
Build tools for minification and compression By minifying JavaScript and CSS files, the size of the application is reduced and improves load time. This can all happen through the use of tools like Gulp, Grunt, or Webpack.
Benefits at a Glance: Files Minification eliminates unnecessary characters through which the code minimizes. Compression reduces the volume of data transferred to clients from the server. Concatenation wraps several files in one so that client machines make fewer requests through HTTP. All the above three techniques result in better performance with desired load speeds.
Monitor Performance Using AngularJS Batarang AngularJS Batarang is a chrome add-on that offers developmental features to the people managing angular applications. The insight it provides about performance bottlenecks will help developers in tracking their digest cycles while monitoring memory.
How To Use It: Identification of unnecessary watchers and bindings. Monitor the performance of digest cycle, eliminate unnecessary actions. Debugging slow running directives and expressions. Regular monitoring on Batarang can help maintain the performance of the application and spot areas to improve.
Final Thoughts In the end, the performance improvement of applications in AngularJS can pave way for an efficient user experience. Reducing the number of watchers, optimizing ng-repeat, minimizing DOM manipulation, improving API handling, lazy loading, and using build tools are some best practices that help developers build faster and more scalable applications.
If you wish to acquire a deep knowledge base and practical experience in developing high-performance AngularJS applications, take up Angular JS Training in Chennai and learn from industry experts to elevate the prospects of your career.
0 notes
Text
VeryUtils Smooth Zoom Pan Image Viewer is an easy-to-use JavaScript
VeryUtils Smooth Zoom Pan Image Viewer is an easy-to-use JavaScript source code for mobile and desktop that adds "pinch to zoom" or "mouse scroll to zoom" functionality to your HTML content.
VeryUtils Smooth Zoom Pan Image Viewer is a JavaScript/CSS-based image viewer designed to display product photos, maps, or any image within a custom-defined small area. It can be configured and implemented on web pages with simple copy/paste steps. It supports all major touch-enabled devices and platforms, including iOS, Android, and Windows.
VeryUtils Smooth Zoom Pan Image Viewer is a straightforward pan/zoom solution for SVGs and images in HTML. It adds event listeners for mouse scroll, double-click, and pan actions, and optionally offers the following features:
JavaScript API for controlling pan and zoom behavior
onPan and onZoom event handlers
On-screen zoom controls
It is cross-browser compatible and supports both inline SVGs and SVGs within HTML object or embed elements.
✅ VeryUtils Smooth Zoom Pan Image Viewer Key Features:
Initial Zoom level
Initial Position
Maximum zoom level
Minimum zoom level
Animation Smoothness
Animation Speed for Zoom
Animation Speed for Pan
Fit or Fill the image
Enable / Disable Pan buttons
Enable / Disable Pan Limitation
Adjustable Button Size, Color, Transparency, Alignment and Margin
Button Auto Hide and Delay Time
Mouse Drag / Touch Drag
Mouse Wheel zoom control
Mouse Cursor location zoom on mouse wheel
Mouse Double Click zoom
Border size, color, transparency
Full browser size option
Max width and height (for window resize)
Touch-enabled: This feature provides familiar touch gestures for zooming content on mobile devices.
Fully responsive: The plugin is capable of adapting to any screen size, ensuring an optimal viewing experience whether you're using desktop or mobile devices.
Cross-browser and compatible with iOS and Android: Whether you're using iOS, Android, laptops, desktops, or even an older browser like IE9, this plugin should function seamlessly.
Simple setup: Whether you're an HTML beginner or a seasoned jQuery developer, setting up the plugin is a breeze. With just a single line of code in either JavaScript or HTML, everything works automatically.
Developer API: This plugin offers developers greater control through the Smooth Zoom Pan Image API.
Multiple instances on one page: You can add multi-touch zooming capability to as many content elements as you'd like on a single page.
Zooming DIV content: Different elements such as images, text, etc., can be placed inside a DIV and zoomed.
Fullscreen toggle support: Small-screen devices often require maximum screen space. This feature allows users to toggle fullscreen mode to view content without clutter.
Adaptive image loading: Optimize load time, resources, and minimize lag by delivering the correct image size for any screen resolution.
Marker and tooltip support: Add markers, zoom to markers, or include tooltips on markers. This functionality is particularly useful for maps, floor plans, or product displays.
Mouseover zoom support: Enable zooming by mouseover on desktop while retaining pinch-to-zoom functionality on mobile devices. This option maximizes user interaction across various devices.
✅ Supported Browsers:
Chrome
Firefox
Safari
Opera
Internet Explorer 9+ (works badly if viewBox attribute is set)
0 notes
Text
Smooth Scrolling in jQuery: Enhancing User Experience with Section Links
Smooth Scrolling in jQuery: Enhancing User Experience with Section Links
Smooth scrolling is a popular web design technique that enhances user experience by creating a seamless transition between different sections of a webpage. It eliminates the abrupt, jarring jumps that occur when users click on links to navigate through a long page. In this article, we will explore how to implement smooth scrolling in jQuery, focusing on the use of section links to make your…
View On WordPress
0 notes
Photo

Jquery Scroll to top button
#scroll top#scroll to top#jquery scroll to top#jquery back to top#back to top button#jquery animation#jQuery Tutorial#jquery scrolltop#scrolltop jquery#scroll to top in jquery#scroll to top jquery#smooth scrolling jquery#back to top jquery
0 notes
Text
Smooth Back To Top Button In jQuery
A tiny jQuery script for creating a custom smooth back to top button that automatically fades in/out on page scroll.
Demo
Download

1 note
·
View note
Text
.
#i just spent like an hour and a half trying to figure out anchor links ^^;;.........#miscellaneous#first i needed to learn how to do them. then i needed to learn how to do smooth scroll. then i realized smooth scroll is fucked up#and you need to go into jquery to fix it which i wont do. but hey it still works#and then i needed to figure out how to do css for link color and hover#but Hey. everything works now except for the smooth scroll going to far down the page#*slaps face* more html and css for another page time woooo
1 note
·
View note
Text
As a starving college student who is in the process of brushing up on their coding skills, is there anyone out there who would be interested in paying about the price of a ko-fi for premade page codes? (I am thinking about themes at the moment, but I need to figure out how Tumblr’s block coding works. After that I’m golden.)
I have made some classes for my web design class that I’m pretty proud of and that would be pretty easy to modify into something like an about or tags page.
#themes#coding#mid.txt#i dont know any jquery yet but I can google plugins like smooth scrolling and shit gjdhshs#but it probably wouldnt be anything fancy like an all in one page or w/e
7 notes
·
View notes
Text
Tutorial: Smooth scrolling using CSS
Hello everybody!
I used to have a problem when it comes to scroll to top back then when I was still new with coding. Whenever I used javascripts available on the internet, it tends to not be smooth (ie it just jumped to the top instead of scrolling to the top). If you're like me, fed up of using javascript/jQuery in attempt of creating a back to top button, there is a way of creating it only using CSS.
This is how the end result would be:

Click at the source to redirect to the demo and its code overview!
Keep reading to learn how to create one!
Setup
To start with, you first need to add this code below underneath 'style' or before /style.
*{ scroll-behavior:smooth!important; }
What this above code means is that upon scrolling, the transition from bottom of the post to the top of the post will be smoother.
Scroll to Top
To create the scroll to top button, you first need to add the following codes into your theme:
HTML

Add this code before /body. What this code does is that it acts as the button for scroll to top. As you can see, there's class="scroll". This class is important for the purpose of you styling it. You can also change the wordings [scroll to top] to anything you want or even change it to an icon. If you want to use an image instead of icons/texts, just replace the wording to img src. Example:
CSS
If you would like to style your scroll to top button, one of the many ways would be as follow:
.scroll{ position:fixed; right:0; bottom:0rem; text-decoration:none; color:#6C4938; background-color:#EDD59D; border:2px dashed #6C4938; padding:1rem; }
The above is the most basic style you can create. You can always use your creativity to make it more attractive :)
#top
Now that we finish with the setup and its button, you will realize that even if you click it, it won't scroll up. This is because we have yet to create the #top. This is the most crucial part because without this, your button would just be dysfunctional.
1. Click ctrl + f.
2. Search "post" or scroll down until you see the post block ({block:Posts}). Take note of the following:
Every theme-maker has different style of naming the class. It can be post/content/posts etc. What is more important is to identify the class which wrap the posts block.
This is the kind of code that you should be looking at:

Again, it very much depends on how the theme maker coded it - it can be article or div or div class="post"> or div id="posts". What is more important is to ensure that the said class/id wraps the block posts.
To identify it, below the said class should be {block:Text} {block:Photo} etc
3. Add this code below the post class:

4. With that, you're done!
Do reblog and like this post if you find this useful! Let me know if you encounter any problems when applying this tutorial inside your theme :)
Important!: If you want it to appear upon scrolling instead making it appear even at the top of the post, you are required to use javascript.
8 notes
·
View notes
Text
How long does it take to learn web designing?

Becoming an best website designers doesn’t want to be tough. If you want to know the essential basics, we’ve prepare this manual that covers the whole lot you need to realize to get started.
What is internet design?
Part artistry and part science, net design faucets into every the modern and analytical side of a person’s thoughts.
Web designers take what’s conceptual and translate it into visuals. Images, typography, colours, text, terrible place, and structure come together offering no longer only a patron experience however a conduit for speakme thoughts.
A best website developers is conscious the importance of each piece of a layout. They make alternatives on a granular degree, styling each element, whilst in no way losing sight of the way the factors will come together and function in handing over at the format’s extra dreams.
Web designs are powered through the lower again give up
You’re going to stumble upon the phrases lower back end and front give up as you are mastering. Most novices combination these up, so it’s important to realize how they’re precise.
The returned end is everything that runs behind the scenes in showing a net website. Websites are dwelling on servers. When a user makes a request like navigating to a particular segment of a internet web page, the server takes this incoming records and in flip shoots out all of the HTML and distinct code simply so it presentations inside the person’s browser effectively. Servers host the records a net web site calls for to feature.
Know what the the the front prevent is
The again quit is taken into consideration the server facet whilst the the the front cease is the patron side. The the front end is wherein HTML, CSS, JavaScript, and distinct code work together to show a internet web site. This is the part of a web layout that humans have interaction with.
As you boost to your profession you can venture into greater specialized regions of net development. You can also additionally turn out to be operating with frameworks like React or Bootstrap or skip deeper with JavaScript or jQuery. These are extra superior regions that you shouldn’t fear too much approximately within the beginning.
How to study net design (in 5 steps)
1. Understand the important thing standards of visible design
Line
Every letter, border, and division in a format is crafted from lines that make up their greater structure. Learning internet design approach know-how the packages of traces in developing order and stability in a layout.
Shapes
The three easy shapes in seen layout are squares, circles, and triangles. Squares and rectangles work for blocks of content fabric, circles paintings for buttons, and triangles are frequently used for icons that accompany an vital message or name to motion. Shapes also have a enjoy of emotion, with squares related to electricity, circles with harmony and luxury, and triangles with importance and movement.
Texture
Texture replicates something in the actual worldwide. Through texture, we get an idea of whether or not or no longer a few factor is hard or smooth. Textures may be visible throughout web design. From paperlike backgrounds to the colourful wisps of a Gaussian blur, be privy to the awesome kinds of textures that would make your designs greater interesting and may supply them a experience of physicality.
Color
To create designs that aren’t an eye fixed strain, you must train your self in shade idea. Understanding the shade wheel, complementary colorations, contrasting shades, and the feelings that unique colorings are tied to will make you a better net fashion designer.
Grids
Grids have their roots inside the earliest days of picture design. They feature so well in bringing order to photographs, texts, and different elements in a web design. Learn how to structure your web layouts the usage of grids.
2. Know the basics of HTML
Hypertext markup language (HTML) gives the instructions for a manner the content, photographs, navigation, and other factors of a internet website online display in a person’s net browser. Though you don’t need to be an professional in HTML, it however permits to have a few familiarity with how it works, even in case you’re the use of a visual-based layout platform like Webflow.
HTML tags are the instructions a browser makes use of to generate a net website. Headings, paragraphs, links, and snap shots are all managed through those tags. You’ll specifically need to apprehend how header tags like H1, H2, and H3 tags are used for content hierarchy. In addition to affecting layout structure, header tags are crucial in how net crawlers classify a design and feature an effect on how they display up in natural are trying to find rankings.
3. Understand CSS
CSS (or cascading fashion sheets) offers styling and extra instructions on how an HTML detail goes to appear. Doing such things as utilizing fonts, such as padding, setting alignment, choosing colours, or even growing grids are all possible via CSS.
Knowing how CSS works will offer you with the abilties to create unique searching websites and to customise modern templates. Let’s pass over a few key ideas of CSS.
4. Learn the regulations of UX
UX is the magic that brings a internet site to lifestyles, remodeling it from a static arrangement of elements into a few element that engages with the emotions of someone scrolling through it.
The color scheme, content cloth, typography, format, and visuals all come together to serve your target audience. User enjoy layout is about precision and evoking emotions. It gives someone now not only a clean journey but an enjoy that connects them with the entity or brand inside the lower back of the net layout.
Here are a few UX standards you’ll need to realize.
User personas
Web design manner understanding give up users. You need to discover ways to do character research and a way to create consumer personas. In addition, you’ll need to realise how to utilize this statistics in developing a layout that’s optimized for his or her needs.
Information architecture
Without easy organisation, humans receives harassed and jump. Information structure and content material mapping provide a blueprint for a way the internet site and every phase will paintings together in offering a clean patron journey.
User flows
Constructing character flows might also come into play at the same time as you paintings your manner as much as greater sizeable design projects, but you’ll be better off within the destiny in case you begin considering those and building them out for your early designs. User flows talk how people will float thru a layout. They will let you prioritize the maximum critical sections and ensure that humans can get right of entry to them.
5. Familiarize your self with UI
A consumer interface is a mechanism that places a piece of generation into movement. A doorknob is a person interface. The extent manage on your car radio that your huge other received’t stop messing spherical with is someone interface. And the keypad that you input your PIN into at an ATM is a consumer interface. Just as buttons and other mechanisms within the real global allow a person to have interaction with machines, the person interface factors on a net website allow a person to position actions into motion.
No code presents an easy access into internet design
There changed right into a time, now not that long in the past, even as you had to have a deep information of HTML and CSS to manually write the code in the back of a web layout. Today, with out a code gadget like Webflow, it’s feasible to put together a website and release it in a brief amount of time. What took days or perhaps weeks can now occur in hours.
Of course, so much goes into developing a pinnacle layout business enterprise web sites. Learning the fundamentals in the back of visual format, the basics of UI and UX, and information how the front give up and again stop function will make you a more best website designers.
#best website design company#top website development company#best ecommerce website development company#best web designers in the qatar
1 note
·
View note
Note
hi there!! can i ask about the theme you’re using?? how did you code the “let’s go” button? i’m trying to make nav links that jump to sections of the page when you click on them but doing <a href=“#sectionname”> on the links to jump to that section doesn’t seem to work. i’m sorry if you don’t answer these types of questions, but your themes are just absolute perfection and work so smooth so i thought i’d give it a shot!!
Hey, I don’t mine answering this at all!
So you’ve got the right idea with doing <a href=“#sectionname”>. That *should* work as long as the section has the id sectionname.
So whatever section you want to link to, make sure you’re doing <section id=“sectioname”> to match your link.
This will make it jump pretty abruptly down the page, though. You can make it smoother with CSS ( scroll-behavior: smooth; is the property and value) or you can use javascript/jquery: https://css-tricks.com/snippets/jquery/smooth-scrolling/
I haven’t tried a vanilla js version of this yet, though.
8 notes
·
View notes
Text
I will convert psd to html xd to html sketch to html css with bootstrap
I will convert psd to html xd to html sketch to html css with bootstrap
Hey, there,
➣ What you'll get in this gig:
★A creative and modern website from very scratch using advanced web technologies
★A fully responsive website that will look perfect on all the small & wide screens.
★I will use advanced CSS3, jQuery animation for your website.
★You will get the complete source code of the final product.
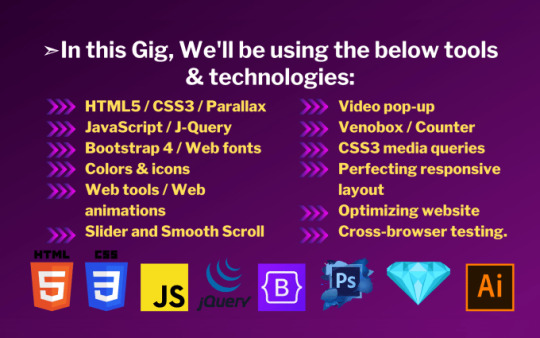
➣In this Gig, We'll be using the below tools & technologies:
HTML5 / CSS3 / JavaScript / J-Query / Bootstrap Framework / Web fonts, colors & icons / / Slider and Smooth Scroll / Video pop-up / Counter / Etc.
➣OUR SERVICES:
★ 100% Responsive
★ SEO friendly code
★ 100% Pixel Perfect Conversion
★ Fresh, Clean, And Well-Commented Hand code
★ 100% W3C validated
★ Cross Browsers Compatible
➣ WHY PREFER US:
★ Fast Response & Communication
★ 100% Satisfaction Guarantee
★ 100% Money-Back Guarantee (If you are not satisfied)
★ Unlimited revisions
★ Free Support 24/7
➣Cost And Time:
The cost and time depend on the page content. So we have to see the design first. "We will discuss it. So please contact us before ordering."
Thank you, sir, for reading our service info. We are always ready for you.
If you hit the red ♥ icon [Favorite] we will be very happy ☺ I will convert psd to html xd to html sketch to html css with bootstrap
#websitedesign#website design#websitedesigner#websitedesigns#website design services#website design sydney#website design springfield mo#websitedesigners#website designers#psdtohtml#psd to html conversion#psdtohtml5#web#web series#design#webdesign#marketing#seo and online marketing#website#css3#css3 animation#html5 css3#programming#programmer
1 note
·
View note
Text
Project 1: Letterform
I was initially struck by the vintage style of Righteous when I was exploring fonts on Google Fonts. The description on Google Fonts mentioned the font was inspired by the deco posters of Hungarian artist Robert Bereny, specifically a piece entitled “Modiano”.

I began to research this period in art history to better understand the font development. Art Deco and Art Moderne represented a period between 1920 and 1945 and derived from the 1925 an art exposition held in Paris. The style incorporated cubism and avant-garde painting styles, along with smooth lines used in Arte Nouveau styles. The style was also incorporated into architecture. The first building to represent Art Deco in America was the Nebraska State Capitol Building in 1919. Other identifying features of the style included intense colors, smooth stones, metal casements, monumentality, vertical lines, ornamentation, mosaics, and relief carvings. As fairs and exhibitions, like the Chicago World Fair, began to pop up in America, the style of Art Moderne began to gain popularity. The smooth finished, line emphasis, and metal frames included only subtle differentiating features that made the style hard to isolate from Art Deco.


These styles can be seen in work from Leonetto Cappiello in “Pates Baroni”, Theophile Steinlen’s “Le Chat Noir”, and Vogue’s 1926 cover.


An emergence of graphic design occurred in the late 19th into early 20th century and had led to the modern “poster” design. Post industrial revolution and World Wars caused a demand for campaigns, which brought advertisements and graphic design to every day life. These posters are seen in Bereny’s work along with US Army Recruitment posters, like “Wake Up America” by James Montgomery Flag. The Great Depression in the 1930s also influenced posters and campaigns. The Franklin D. Roosevelt administration created the Works Project Administration to help stimulate the economy, especially for artists. This initiative led to a series of graphic art pieces promoting national parks within the United States, like Alexander Dux’s “See America”.


I consolidated my research choosing keep points from the Righteous font family history to be used as the body copy for my letterform analysis:
“Righteous was designed by the Astigmatic One Eye Typographic Institute. It was initially inspired by the all capitals letterforms in the 1932 poster by Hungarian artist Robert Berény, “Modiano”. The Art Deco style transitioned into the 1930s style of Art Moderne, which is reflected in the grid based, geometric forms of this font family. Block colors featuring shades of red, gold, and black and smooth lines are representative of this movement. I chose Righteous because of its vintage inspiration and whimsy features.”
To draw attention to distinguishing features of the font family, I noticed asymmetric features and differing widths. I used lines to highlight the individual widths and circles to emphasize the angled ends on the vertical line in an “a” form.

I used the history to inspire my wireframe sketches. For the Art Deco designs, I focused on ornamenting the letter with artifacts indicative of the era. Some of these artifacts included cigarette holders, hats, gloves, pearls, mustaches and canes.


I chose to focus one of my designs on Art Moderne’s influence on architecture.

The font in itself has a whimsical nature, so I explored this as well. The lowercase “a” in Righteous reminded me of a childish drawing of a fish, so my sketches became influenced by a fun, nostalgic feeling.

I began to transfer wireframe sketches to digital style tiles using Adobe XD. I used gilded and bold colors along with more sultry black, grey, and red shades seen in many posters of the time. For the fish, I began to explore indicative colors of sea-life and settled on a classic goldfish orange. To contrast the bright orange, I used the blue of the ocean and referred to a color wheel to choose the shade of blue I felt would be best for the page.

I settled on a darker toned navy-violet. However, I wanted to maintain an emphasis on the “a” form, so I did not use the orange color for the rest of the content on my page. I chose a contrasting sea foam color that would stand out against the navy background while remaining within the range of blue shades.


While I was initially drawn to the vintage, flapper society style characterized in Righteous, I decided to focus on the more whimsical nature of the font after comparing the style tiles.
Adding to the whimsy and extending the oceanic design of my page, I incorporated more features that would indicate to the viewer that the “a” is representing a fish in water. I added waves and bubbles to bring the page to life. Since the bubbles were placed closer to the letterform, I wanted to use one of the bubbles as the button for my letter analysis.


After critiques, I felt the need to make the button clearer, so I added a white speck on the bubble and a subtle drop shadow to create a 3D effect that would differentiate the button from the rest of the bubbles. The purpose of this detail was to influence a viewer’s interaction with my page.


Other interactions include the underline that appears when viewer’s mouse over hyperlinks, and the ability to scroll through the font family “showcase” at the top of the page.
To aid in my understanding of how to layout my html, I created a box wireframe on my final XD style tile to separate the content.

Doing so helped make the transfer from static design to live code more comprehensible and easier to manipulate. After coding a box html skeleton, I began to include my content and various assets I created in Photoshop and Illustrator. I added jquery to allow my button analysis to have a behavior.


The page was uploaded to Github desktop and is now live at https://swalker97.github.io/Walker_project1-jquery/index.html.
References
https://fonts.google.com/specimen/Righteous
https://99designs.com/blog/design-history-movements/historys-most-famous-posters/
https://circaoldhouses.com/art-deco-art-moderne/
2 notes
·
View notes
Text
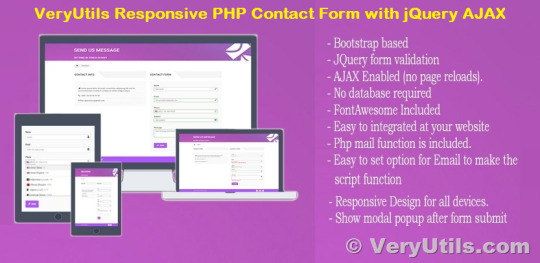
VeryUtils Responsive PHP Contact Form with jQuery AJAX
VeryUtils Responsive PHP Contact Form with jQuery AJAX. VeryUtils Responsive Ajax Contact Form is a cutting-edge tool for web developers and website owners looking to streamline their contact process. This powerful form solution is designed to provide a seamless user experience by eliminating the need for page reloads when submitting contact requests. With its responsive design and extensive compatibility with various devices and browsers, VeryUtils Responsive Ajax Contact Form is the perfect solution for websites of all types and sizes.
One of the key highlights of the VeryUtils Responsive Ajax Contact Form is its responsive design. It is fully tested on iPad, iPhone, and Android devices, ensuring a smooth and consistent user experience no matter the device being used. The Group CSS feature also enables developers to create complex form layouts, making it easy to customize the look and feel of the form to match the website's overall design.
Installing the VeryUtils Responsive Ajax Contact Form is quick and straightforward, and it can be easily embedded into any web page using PHP or HTML. The powerful code framework makes it possible to customize the form in any way desired, giving website owners full control over their contact process. The form validation and filtering features are also highly customizable.
The VeryUtils Responsive Ajax Contact Form also supports file uploads, making it possible to send attachments along with contact requests. The form data can also be saved to a database, providing a convenient and secure way to store information from visitors. A custom autoreply message can be set up to automatically respond to form submissions, and the form can be easily adapted to serve as a register form, quote form, or any other type of form with the desired fields.
Another impressive feature of the VeryUtils Responsive Ajax Contact Form is its multi-language support. With UTF-8 encoding enabled by default, the form can easily process information submitted in various languages, making it a great solution for non-English websites. The form also uses valid HTML5, ensuring compatibility with all major browsers.
To get started with the form design, three ready-to-use themes are included, and the styles can be easily altered to match the website's aesthetic. The jQuery effects provide a visually appealing way to handle form submissions, and the form works just as well with or without JavaScript. If there are any error messages that are out of view, the form will automatically scroll to them, making it easy to resolve any issues and submit the form.
In conclusion, the VeryUtils Responsive Ajax Contact Form is a comprehensive and user-friendly solution for website owners looking to streamline their contact process. With its responsive design, customizable features, and extensive compatibility with various devices and browsers, it is the perfect tool for any web development project.
0 notes
Text
Add Smooth Scrolling When Clicking Anchor Links
A super tiny smooth scroll jQuery plugin that automatically applies a smooth scrolling effect to anchor links found within the document.
Demo
Download

1 note
·
View note
Text
6 excellent CSS features that are unknown and not used much
::selection Pseudo-element
Thanks to the pseudo-element ::selection, you can format the text you are passing through with the cursor with different css properties.
Example:
.ornek-1::selection { background-color: #000; color: red; }
.ornek-2::selection { background: transparent; text-shadow: 1px 0 4px red; }
2. caret-color
With the caret-color property, you can change the color of the cursor when the input is focused.
Example:
input { caret-color: red; }
3. Smooth Scrolling
One of the little-known features of CSS, the scroll-behavior is a great feature that expresses how scrolling in the browser should be done. The scroll-behavior is "auto" by default. When this feature is "smoothed", page scrolls will occur in a soft animated way.
NOTE: This feature is not yet supported in Safari and Opera browsers. (You can find out which browsers support a feature and which are not supported by caniuse.)
Example:
html { scroll-behavior: smooth; }
4. Custom scrollbar
You can customize this helpful tool, which is used to move up or down websites by using the scrollbar, which is usually called scrollbar, using css features and appearing in slightly different ways in different browsers.
The process of changing many properties of the scrollbar such as color, background color, corners, width can be done with the following codes. Thanks to these codes, a customized scroll bar will appear everywhere a scrollbar appears on the site.
For those who do not want to deal with these codes and want to use ready-made plugins, I can recommend the jquery-based Malihu Custom Scrollbar plugin.
5. Truncate Text
You can use the -webkit-line-clamp property to display text up to any number of lines. It will show the text by adding an ellipsis to the end of the last line.
6. Custom cursor
You can show pictures or even emoji instead of your default pointer.
Example:
.emoji-cursor { background: purple; cursor: url("data:image/svg+xml;utf8,🐥"), auto; }
.image-cursor { background: yellowgreen; cursor: url(https://picsum.photos/60), auto; }
1 note
·
View note
Text
jQuery Cross Browser Scroll To Top with Animation Tutorial
Inside this article we will see the concept i.e jQuery Cross Browser Scroll To Top with Animation Tutorial. Article contains the classified information about Scroll to the top of the page using JavaScript / jQuery.
If you are looking for a solution i.e jQuery Smooth Animated Scroll to Top of page Using jQuery / Javascript then this article will help you a lot for this. Tutorial is super easy to understand and implement it in your code as well.
0 notes